

Table of Contents
Hanukkah crafts for kids work best when they are planned the way the holiday actually runs: eight nights, one candle at a time, and a house full of children who want to make something with their hands while the latkes fry. Hanukkah in 2026 runs from sundown on Friday, December 4 to nightfall on Saturday, December 12, which gives you a long runway. Start the first weekend of December, or even the last weekend of November, and by the first night your windows, fridge, and mantel will already carry something your children made themselves.
This guide has 15 crafts, five for each age band: ages 3 to 5, ages 6 to 8, and ages 9 to 12. Every one of them is something a child can genuinely do, not a project where the adult does the work while the child watches. Each craft lists its materials and how long it takes, and the classroom-friendly ones are flagged so teachers can pick them out at a glance. Nothing here needs a craft-store expedition you will regret. Most of it comes from paper, cardboard, paint, and the recycling bin.
One safety rule runs through the whole list. The menorah your child makes is for display, not for real flames. Craft menorahs get battery candles, paper flames, or LED tea lights. Real candles belong in the real menorah, lit by an adult, on a stable surface away from paper chains and tissue-paper stars. Keep that line clear and every craft below stays safe.
How to Pick Hanukkah Crafts for Kids by Age
The fastest way to ruin a craft afternoon is to hand a four-year-old a project built for a ten-year-old, or to hand a ten-year-old something they finished in nursery school. Age bands are not about talent. They are about patience, fine motor control, and how long a child will happily sit at a table before wandering off to spin a dreidel at someone.
Ages 3 to 5 need big movements, bright colors, and a finished thing within 20 minutes. Think handprints, stickers, and tearing paper rather than cutting it. Ages 6 to 8 can follow three or four steps, use child-safe scissors, and wait for glue to dry without declaring the project ruined. Ages 9 to 12 want a real result: something they would actually give to a grandparent, hang in their room, or use in the dreidel game without embarrassment.
Set the table before you start. Cover it with newspaper or a cheap plastic cloth, put out a small bowl of water for brushes, and give each child their own glue stick and scissors. Shared glue bottles cause more arguments than any craft ever has. If you are working with a group, make one finished example first and keep it where everyone can see it. Children copy what they can see far better than they follow spoken instructions.
Finally, plan for drying time. Paint, glue, and glitter need somewhere flat to sit overnight. A baking tray per child works well: projects go on the tray, the tray goes on a high shelf, and nobody’s menorah ends up stuck to the cat. If you are short on time, pick the crafts marked 15 minutes and save the painted ones for a day when you are not also cooking dinner.
Hanukkah Crafts for Kids Ages 3 to 5

These five crafts are built for small hands and short attention spans. Each one finishes in 20 minutes or less, uses materials you probably already own, and produces something a preschooler will be proud to show off. The mess stays manageable because the steps are big and the tools are simple.
1. Handprint Menorah
Materials: blue card, yellow and orange paper, child-safe scissors, glue stick, a pencil. Time: 15 minutes, plus drying.
Trace your child’s hands on the blue card and cut out the prints together, or cut them yourself while they watch. Arrange nine handprints in a row along the bottom of a large sheet of paper, fingers pointing up, like the branches of a menorah. Glue them down, then cut small flame shapes from yellow and orange paper and glue one above each handprint. The middle flame, the shamash, sits slightly higher than the rest, which is a nice moment to explain that the helper candle lights all the others.
Add one paper flame each night of Hanukkah, and the picture grows along with the holiday. This is the classic preschool Hanukkah craft for a reason: it is simple, it looks great on a fridge, and grandparents genuinely love receiving one.
2. Paper Plate Dreidel Spinner

Materials: paper plate, blue and white paint or crayons, a split pin or a short pencil, stickers. Time: 15 minutes.
Let your child paint or color the paper plate blue, then stick star stickers around the edge. Cut the plate into a simple dreidel shape if you like, or keep it round and draw the four Hebrew letters on it with a thick marker: nun, gimel, hay, shin. Push a split pin or a short pencil through the center so the plate spins on the table. It will wobble, it will fall over, and your child will not care at all.
The point is not a perfect spinner. The point is a child who made a dreidel and understands, in a general way, that the letters stand for the words of the Hanukkah story. Play a round with chocolate coins afterward and the lesson sticks.
3. Star of David Suncatcher
Materials: clear contact paper or a zip-lock bag, blue and yellow tissue paper, scissors, ribbon. Time: 15 minutes.
Cut two triangles from card and tape them together into a star shape to use as a frame, or simply cut a star from contact paper. Your child tears tissue paper into small pieces and sticks them onto the sticky side, overlapping the colors until the star is covered. Press a second sheet of contact paper over the top to seal it, trim the edges, and punch a hole for ribbon. Hang it in a window and the winter light does the rest. Tearing paper is excellent practice for small hands, and there is no wrong way to do it, which is exactly what a three-year-old needs from a craft.
4. Gelt Bag Decorating

Materials: small paper bags or fabric pouches, star and dreidel stickers, blue and gold markers, chocolate coins. Time: 10 minutes.
Give each child a small bag and let them decorate it however they like with stickers and markers. There are no rules beyond keeping the marker off the table, and even that is negotiable. When the bag is done, fill it with a few chocolate coins. This is the fastest craft in the whole list and the most useful: the bags become the gelt pouches for the dreidel game, or a small gift for a cousin. Make one per night of Hanukkah and you have eight small presents sorted before the holiday starts.
5. Cotton Ball Candle Flames
Materials: blue card, nine cardboard tubes or rolled paper, cotton balls, yellow paint, glue. Time: 20 minutes.
Glue nine short cardboard tubes in a row onto a piece of blue card to make a menorah shape. Your child paints the tubes blue or silver, then pulls cotton balls into flame shapes, dabs them with yellow paint, and glues one on top of each tube. The cotton flames are soft, safe, and look surprisingly good. This craft also teaches the shape of the menorah without any talk of real fire, and the finished piece is sturdy enough to stand on a shelf all eight nights.
Hanukkah Crafts for Kids Ages 6 to 8
Children in this band can cut, fold, measure, and follow a short sequence of steps. These five crafts take a little longer and ask a little more, but each one still finishes in a single sitting. They are also the sweet spot for classroom use: enough structure to teach with, enough freedom to keep it fun.
6. Cardboard Tube Menorah
Materials: nine cardboard tubes, a shoebox lid or a piece of thick card for the base, blue and silver paint, gold paper, battery tea lights. Time: 40 minutes, plus drying.
Cut the tubes to two heights: eight the same, one taller for the shamash in the middle. Paint them blue or silver and let them dry fully, which is the hardest part of this craft for an eight-year-old. Glue them in a row onto the base, cut flame shapes from gold paper, and glue a flame to the top of each tube. Slip a battery tea light inside each tube and the menorah glows. This is the craft to make if your child wants a menorah of their own next to the family one. It looks genuinely good on a windowsill, and because the flames are paper and the lights are battery-powered, it is safe to leave out all week.
7. Painted Wooden Dreidels
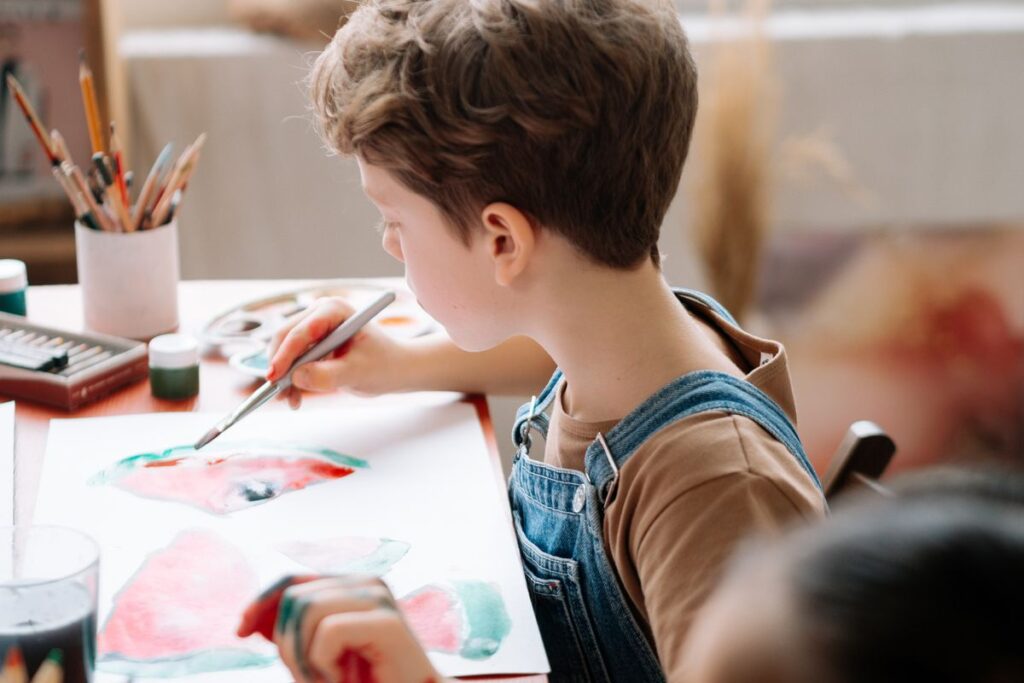
Materials: plain wooden dreidels from a craft store, acrylic paint, small brushes, a cup of water, newspaper. Time: 30 minutes, plus drying.
Wooden dreidel blanks cost very little and paint beautifully. Let your child paint each side a different color, then add dots, stripes, or a star once the base coat is dry. A grown-up can help paint the Hebrew letters on each side afterward, or older children in this band can try the letters themselves with a fine brush. Seal with a coat of clear varnish if you have it, though it is not essential. Painted dreidels make excellent small gifts, and a set of four in a little bag is a present a child can genuinely say they made. Buy a few spares: the first one always gets painted over three times.
8. Hanukkah Pop-Up Card
Materials: blue card, white card, scissors, glue stick, gold star stickers, markers. Time: 25 minutes.
Fold a piece of blue card in half for the card base. Cut a small menorah shape from white card, fold its base into a tab, and glue the tab inside the fold so the menorah pops up when the card opens. Your child decorates the front with star stickers and writes a message inside. The pop-up mechanism is simple enough for a seven-year-old to manage with a little help, and the surprise of it opening makes the card feel far more special than a flat drawing. Make one for each grandparent and the card problem for Hanukkah is solved.
9. Blue and Silver Paper Chain Countdown
Materials: blue, white, and silver paper, scissors, glue stick or tape. Time: 25 minutes.
Cut the paper into strips about two centimeters wide and fifteen long. Show your child how to loop the first strip into a ring and glue it shut, then thread the next strip through and repeat until you have a chain of eight links, one for each night, plus a star at the end. Hang it across a doorway or along a mantel. Each night, remove one link as the candles are lit, or add one link each night as the light grows. Either way the chain turns the abstract idea of eight nights into something a child can see and touch.
This is one of the best classroom-friendly Hanukkah crafts for kids: it scales to thirty children with nothing but paper and glue, and it decorates the room for the whole week.
10. Star of David Window Stars
Materials: wax paper or tracing paper, blue and white crayons or tissue paper, scissors, an iron and a tea towel (adult job). Time: 30 minutes.
Your child arranges small pieces of tissue paper, or crayon shavings, between two sheets of wax paper in a star pattern. An adult covers the sandwich with a tea towel and presses it briefly with a warm iron to melt everything together. Trim the result into a star shape and hang it in a window. The light shining through the melted colors is lovely, and the craft introduces a satisfying bit of kitchen science. Keep the iron firmly in adult hands and let the child do the arranging, which is the fun part anyway.
Hanukkah Crafts for Kids Ages 9 to 12
Older children want projects with a real payoff: something they would keep, use, or give away without feeling babyish. These five crafts take longer and need more patience, but the results are the kind of thing that stays on a shelf long after the holiday ends. They also make good gifts, which matters to a ten-year-old who has started to notice that adults like handmade presents.
11. Clay Menorah
Materials: air-dry clay, a rolling pin, a knife or clay tool (adult supervision), blue and silver paint, battery tea lights. Time: 45 minutes, plus overnight drying.
Roll the clay into a thick slab for the base and nine small cups for the candle holders. Press the cups onto the base in a row, with the middle one slightly higher, and smooth the joins with a wet finger. Let it dry overnight, then paint it blue and silver and add gold details. Slip battery tea lights into the cups. Air-dry clay is forgiving stuff: if a cup collapses, roll it again. The finished menorah is heavy, solid, and genuinely usable as a decoration, and it is the craft most likely to survive into next year. Remind your child that clay menorahs hold battery candles only, never real ones.
12. Dreidel Gift Box
Materials: a small square box or a piece of thick card, blue paper, ribbon, scissors, glue, small treats. Time: 30 minutes.
Cover a small box in blue paper and add a pointed paper lid and a little handle so it looks like a giant dreidel. Decorate each side with a Hebrew letter cut from gold paper. Fill it with chocolate coins, a small toy, or a handwritten note and give it to someone. This is a good craft for a child who likes making things for other people, and it teaches a useful skill: wrapping a box neatly in paper without wrinkles is harder than it looks and satisfying to get right.
13. Hanukkah Lanterns
Materials: glass jars, tissue paper, glue or decoupage medium, a brush, battery tea lights, ribbon. Time: 30 minutes, plus drying.
Brush glue onto the outside of a clean glass jar and press on pieces of blue, white, and gold tissue paper, overlapping them until the jar is covered. Leave a few gaps so the light can shine through more brightly in places. Once dry, tie ribbon around the neck and drop in a battery tea light. A row of these lanterns on a windowsill looks wonderful on a dark December evening, and they are far safer than anything involving a real flame. Older children can cut the tissue into star and dreidel shapes for a more deliberate design. Save a few jars from the recycling bin now and you will have plenty by December.
14. Woven Star of David Wall Hanging
Materials: two sticks or dowels, blue and white yarn, scissors, beads. Time: 45 minutes.
Cross two sticks into a star frame and tie them at the center, then weave yarn back and forth across the frame in a simple over-under pattern. Add beads at the ends of the yarn for weight and decoration. The weaving is repetitive and calming, and the finished hanging looks like something from a craft fair rather than a school table. This is a good quiet-evening craft for the nights when the house is full of relatives and a child wants something to do with their hands while the adults talk.
15. Hanukkah Memory Game
Materials: 16 squares of thick card, markers or printed pictures, a small bag or box. Time: 40 minutes.
Your child draws or prints eight pairs of Hanukkah pictures: menorah, dreidel, latkes, sufganiyot, gelt, candles, star, and gift. Glue the pictures onto the card squares, one picture per square, and let them dry. Once the set is complete, the game is ready to play: lay the cards face down, turn two over, and keep the pair if they match. A handmade memory game is a craft and a present in one, and it gets played all week rather than admired once and forgotten. Laminate the cards with clear tape if you want the set to survive younger siblings.
Classroom-Friendly Hanukkah Crafts for Kids

Teachers need crafts that work for twenty or thirty children at once, with cheap materials, minimal drying time, and no step that requires one adult per child. From this list, the strongest classroom picks are the handprint menorah, the paper chain countdown, the gelt bag decorating, and the pop-up card. All four use paper, glue, and scissors, all four finish inside a lesson, and all four let every child take something home the same day.
A few practical tips make the difference. Pre-cut the fiddly parts the night before, especially for the youngest classes. Set up materials in stations rather than handing out a full kit per child: a cutting station, a gluing station, and a decorating station keeps the room moving and the mess contained. Put a finished example on every table so children can see what they are aiming for without queuing at your desk. And always have a spare activity ready, because in every class one child finishes in eight minutes and another is still choosing paper colors at twenty-five.
Be careful with the holiday itself in a mixed classroom. Hanukkah crafts for kids work well as a way of learning about how other families celebrate, alongside crafts for other winter holidays. Keep the explanation simple and factual: Hanukkah is an eight-night Jewish festival of lights, families light a candle each night on a menorah, and children play with a spinning top called a dreidel. That is enough context for any of these crafts to make sense, and it is accurate. For the story behind the candles, Chabad’s guide to lighting the menorah explains the nightly ritual and the oil story in plain language, which is useful if a child asks why there are nine candles instead of eight.

How to Display the Crafts and Keep Them Safe
Crafts only feel worth making if they get seen. Give each child a display spot: a low shelf, a windowsill, or a piece of string with pegs along a wall. Rotate the display through the eight nights so the newest craft gets the best spot. Photograph everything before it goes home in a school bag, because paper chains and cotton-ball flames do not survive school bags.
Keep craft menorahs away from the real menorah. Paper, tissue, and cotton wool burn easily, and a craft display that creeps too close to real candles is the one genuine hazard in this whole guide. Battery candles solve the problem completely, and modern LED tea lights flicker convincingly enough that children do not feel shortchanged. If your family lights real candles, do it on a clear, stable surface with nothing flammable within an arm’s length, and never leave the room while they burn.
Storage is simple. Flat paper crafts go in a large folder or between sheets of newspaper. Clay and wooden pieces go in a box with tissue paper between them. Label the box with the year. Next December, opening it is a small holiday of its own, and your child will be amazed at how small their handprint was last year.
What to Do With the Crafts Once Hanukkah Starts
Crafting is only half the fun. The other half is using what you made. The painted dreidels go straight into the dreidel game on night one. The pop-up cards get handed over with the gifts. The paper chain counts the nights down. The lanterns light the windowsill while the real menorah burns on the table.
Hanukkah is also a week of food and gifts, and the crafts fit into both. If you are pacing gifts across the eight nights, a handmade gift on one of the early nights sets a lovely tone and takes the pressure off the shopping. Our guide to Hanukkah gift ideas for 2026 has a plan for spreading presents across the week without spending a fortune, and several of the small-gift ideas pair well with a handmade card.
After an afternoon of crafting, the kitchen is the natural next stop: our crispy latkes recipe is an easy one to make with children helping to grate and mix, and frying latkes is itself a kind of craft, just one you can eat. And if the finished crafts have made the house look festive, our Hanukkah decoration ideas show how to build the rest of the room around them, with the kids’ craft corner as part of the plan rather than an afterthought.
Frequently Asked Questions
What age can children start doing Hanukkah crafts?
Three is a good starting age for the simplest crafts in this guide, like the handprint menorah and the gelt bag. At three, the child does the sticking, tearing, and painting while the adult handles the scissors. By six, most children can manage a full craft on their own with occasional help. The age bands in this guide are a starting point, not a rule: a careful five-year-old may manage a craft listed for ages 6 to 8, and a restless nine-year-old may prefer a quick fifteen-minute project to a forty-five-minute one.
Are Hanukkah crafts for kids suitable for a classroom with mixed faiths?
Yes, when they are presented as learning about a holiday rather than celebrating it as a religious observance. Keep the explanation factual and short, focus on the making, and offer the same craft time to other winter holidays so no child feels singled out. The paper chain, the star suncatcher, and the handprint menorah all work well in this setting.
How do I keep craft time from turning into a huge mess?
Cover the table, give each child their own glue stick and scissors, and put paint in small pots rather than open jars. Keep a damp cloth on the table for hands. Choose one messy craft per session and pair it with a dry one, and set a clear clean-up routine before you start: everything in the bin, brushes in the water, hands washed. Children clean up far better when they know the routine in advance.
Can kids use real candles in a craft menorah?
No. Craft menorahs made from paper, cardboard, clay, or wood should only ever hold battery candles or LED tea lights. Real candles belong in a proper metal or ceramic menorah, lit by an adult, on a stable surface away from anything flammable. The battery lights look convincing and remove the only real safety worry in this guide.
What are the easiest Hanukkah crafts for kids if I only have an hour?
The gelt bag decorating takes ten minutes, the handprint menorah takes fifteen, and the paper plate dreidel takes fifteen. Do all three in an hour and you have a gift bag, a fridge picture, and a game to play. That is a complete craft afternoon with time left over for latkes.
How early should we start crafting for Hanukkah 2026?
Start the last weekend of November, November 28 to 29, so the house is ready for the first night on Friday, December 4. Painted and clay projects need overnight drying, so make those first. Paper crafts can be done any time during the eight nights themselves, and making one craft per night is a lovely way to pace the week.
Leave a Reply